Showing posts with label Q and A. Show all posts

Thursday, July 14, 2011

raising chickens

Karen asked recently if I had any advice
on raising chickens,
so I thought I would mention
it here, rather than just in comments.


Raising chickens {10+years}
 is still a learning process for me,
and we've certainly made some mistakes
along the way.
I started out by reading up on the subject,
and Ashley English now has a nice
book out called
which might be a good place to start.
I've been ordering my chicks from Murray McMurray Hatchery
from the beginning.  Great company to deal with,
and I have always had great luck with their birds.
They supply you with good instructions for getting
your baby chicks started.
We began with Rhode Island Reds,
but soon branched out to other breeds.
These are my favorite layers:
Araucana/Americana
Black Australorps
Partridge Rocks
Buff Orpingtons
Speckled Sussex
Buff Brahmas
My Araucana's are my best layers,
and their colored eggs are lovely.
Picking a breed suited to your climate is a good
idea too--the catalog recommends certain breeds
that are good winter layers for those of us in
colder climates.
I think keeping our hen house very clean,
and providing fresh water daily
are two important factors for healthy hens.
The biggest trial we have had with our chickens,
has been dealing with foxes--we lost many
of our hens in the beginning.
We did not make the fence surrounding the chicken
yard high enough, and they were able to fly out.
Many an evening we would have to herd
them back in through the gate,
and not all would cooperate.
Somehow it was much harder for them to figure
out how to fly back in,
and by morning there would be a pile of
feathers left in the yard.
We have since extended the height to about 6 ft.
and it keeps them in.
The fox has also dug under the fence,
so it is important to bury part of the fencing
 below ground level.
~
I hope this helps a little bit Karen,

~Deb


Tuesday, June 22, 2010

making a slipcover from old linen tablecloths

lifeinredshoes asked about my linen tablecloth slipcover way back when,
so I thought I would show you
what I did.
For each part of the loveseat
I roughly cut out a piece of linen
that was a couple inches larger all around.
Extra needs to be left wherever you will
be tucking in the slipcover ~ in this case,
all around the back and sides of the seat.
I lay the pieces in place right side down
and pin them somewhat snuggly along all the
seam lines.
Relief cuts are needed along curves,
and some spots get a bit tricky.
Once all is pinned, I trim away the excess
fabric, leaving about a 1 inch seam
allowance.
Then, it is gathered up and taken to the sewing
machine.  I sew my seams along the pinned
lines, periodly placing the cover back
on the furniture to recheck it.
There is often a bit of seam ripping
involved in this process!
I used to do piping on many of my slipcovers,
but lately I have been taking the simpler route
{gotten lazy} and have left it out.
This is a very simple explanation--if you
would like more details, I have

Thursday, March 11, 2010

on knitting

Despite all the lovely sunshine we've been having and the warm-for-this-time-of-year temps {40 to 50 degrees F}
for the last week, we still have snow,
and where the snow has melted, we have puddles...lots of puddles.
Our garden is covered half in snow and half in water,
so not too much to do yet as far as gardening or yard work.
I've really been in the mood to knit, even though the Cavern cardigan I was working on {here} did not work out. I love the top down construction, but once I got the body done I realized it was much too big--I suppose it may have something to do with the fact that I wasn't even using the right size needles...no idea what I was thinking!
As I was ripping it all out, I came across this free pattern and decided to give it a try.
So far I have the back and the left side completed.
One of my readers, Jan, asked how and when I learned to knit, and what would be a good book to get her started.
I was taught by my mom {who made us mittens and wonderful sweaters & hats for our Barbie dolls} at an early age--not sure exactly...maybe by age 10? I remember struggling with the stitches which always seemed to be too tight. Eventually I got better and I remember making some scarves. Then I learned crochet, and knitting fell by the wayside--I was busy making granny square afghans in the late 70's & early 80's. It wasn't until about 5 years ago that I got serious about knitting and decided to attempt a sweater.
I went to the library and started reading knitting books, and a couple that stand out as far as helpfulness are Elizabeth Zimmerman's Knitting Without Tears: Basic Techniques and Easy-to-Follow Directions for Garments to Fit All Sizes
and Debbie Stoller's Stitch 'N Bitch: The Knitter's Handbook
.
There are also some online video tutorials that have helped me out a lot ~ it is so much easier when you can actually see someone doing the stitches/techniques. Knit Picks has many beginner tutorials {here}.
Don't be intimidated, just keep trying and practicing. My first sweater was awful!...but the second one was much better.
Jan, I hope this helps.

Wednesday, October 01, 2008

bias tape makers

Lorna had a question about bias tape makers, and what size had I used for the napkins which I made for Rhonda's napkin swap...

I used the 1-inch Dritz bias tape maker you see above. I would have preferred a Clover brand, just because I've found them easier to use, but my local fabric store didn't have it.

For the 1" bias tape maker, you cut your strips of fabric about 1 3/4" wide. What you end up with is a double fold bias tape about 1/2" wide.

There are some great pictures here on Purl Bee that show the process much better than I could explain it.

I think this size tape would also be a good size for many other types of projects like potholders and placemats as well.

Hope this helps.

Deb

Tuesday, August 19, 2008

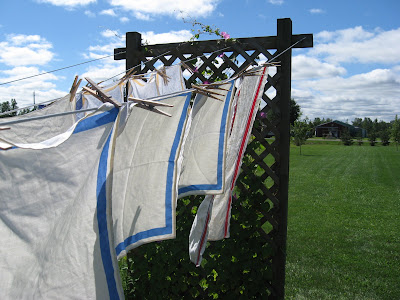
the trellis clothesline


Supermommy asked about my trellis clothesline, so as I headed out with my basket of laundry to hang, I grabbed the camera as well. Jodie also asked about the vines--they are morning glories. As I hang my laundry each morning, they are at their best!

The posts in the ground are 4x4's and are shiplap joined across the top with a 2x4--all pressure-treated lumber.

A sheet of lattice was cut to size and nailed to the inside...

It was a beautiful day for hanging out my new flea market napkins and towels.

Next, I head to the barn to feed the cats...

Jessica is waiting anxiously to be let out to graze...

Over at the henhouse, more morning glories climb the fence and nasturiums are overflowing the half-barrel I planted them in. The picture doesn't do them justice; many of the blossoms are hidden inside the foliage...I will definitely be planting many more of them next year--love them!
Thanks for joining me on my morning rounds.


Tuesday, September 04, 2007

some answers

I'm really feeling bad...I am not able to respond to each and every wonderful comment I receive, as I would like to. There are over 350 e-mails in my inbox, waiting....I keep thinking I can catch up, but the busyness of summer has prevented me from doing that. So to each and every one of you, thank you sincerely for your kind and supportive comments. You are all incredibly nice and wonderful ladies!!

I have scoured through the e-mails in hopes of answering some of the questions you have. If I've missed a question, please feel free to e-mail me with it again.

Question for you...how do you keep your dog(s) and cat away from the chickens? Our dog would love to take a bite out of ours so we can't let them out in the yard. :(
Well, luckily none of our cats have ever bothered the chickens, nor has our golden retriever/collie dog. When we first got chickens though, our cocker spaniel, Zoe, thought it was her duty to chase and attack them. As soon as we realized this, we kept a very close eye on her. The next time she chased a chicken, my husband gave her a swat and reprimanded her in his most disapproving voice; she has never bothered the chickens again. Now, if we need help getting a chicken back into the pen, she does an excellent job of gently 'herding' them.
Talk to me about your clothes pin bags-- do you have a pattern? Is it your design?
I looked at a lot of clothespin bags to find a style I liked. I came up with a size, and a pretty typical shape, and have gradually perfected my construction method. So many have asked about a pattern ~ I would like to do a tutorial as soon as I have a bit more time, probably this winter.
I need to ask --- what kind of camera do you have?? I need to buy a new one and would appreciate some feedback... thanks!!
The camera I use is a Kodak DC210 Zoom. It's the first digital camera my husband bought and so simple even I can figure it out! I've claimed it as my own, as Mike and Stephanie wanted something with more megapixels.
Oh, I would love to learn how to make an ottoman slipcover like yours! Can you post a pattern or directions? The hard part is the piping.
I promise to try and post on this. I'll be making some slipcovers this fall/winter and will try to post some pictures.
Just wondering... my containers never end up looking very good; is there a secret to keeping them looking so gorgeous?
The secret I've discovered is to water EVERY day. I didn't always do so until this summer, and I can see the difference it makes. And I feed them about once a week.
I really like those (clothespin) bags. Where did you get your hangers?
I have found the vintage wooden hangers at yard sales or on Ebay.
How do you freeze your corn?
I follow the directions in the Ball Blue Book: The Guide to Home Canning & Freezing ~ Scald ears of corn for about 5 - 6 minutes; cool in ice water; cut kernels from cob, and pack in freezer bags. I use my vacuum sealer to seal the bags.
I'd love to know more about your ironing table--did you make it? If so, how?
You can read about how I made the ironing table here.
please do share your Enchilada Casserole crock pot recipe!
I found this crock pot recipe here, at a beautiful blog called Eyes of Wonder, with which many of you are probably already familiar. I had to cut it down for my much smaller family ~ I only used about 1/3 to 1/2 the measure of ingredients that Jewels has listed. It is very good and I would definitely make it again!
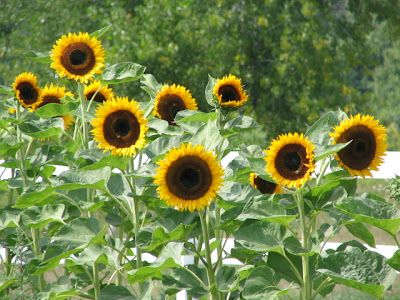
I'll leave you with a few more late summer flower pictures...


LinkWithin

Related Posts with Thumbnails